If you’re looking for a fun, budget-friendly way to spend your weekend, your Raspberry Pi has you covered. Even with just a few dollars and basic components, you can build projects that are surprisingly useful, educational, or just plain cool. These ideas are great if you’re new to the platform or simply want a quick win without a big investment. All of them can be done with items you probably already have or can find for under $5.
5
Turn it into a Pi-hole ad blocker
Block ads and trackers across your whole network
Pi-hole is a powerful network-wide ad blocker that runs beautifully on a Raspberry Pi. It works by acting as your home DNS server, filtering out ad-serving domains before your devices ever connect to them. You’ll get faster page loads, fewer distractions, and increased privacy. Best of all, it’s lightweight enough to run on older Raspberry Pi boards like the Zero or 3B.
To get started, all you need is a Raspberry Pi, a microSD card, and power. The Pi-hole setup script takes care of the installation process, and a web-based admin interface makes management easy. Once installed, you point your router’s DNS settings to the Pi’s IP address, and it starts blocking ads across every device on your network. If you prefer more control, you can tweak blocklists, create whitelists, and view detailed logs of DNS queries.
The project stays well under the $5 mark if you’re reusing gear you already have. Even a secondhand microSD card will work fine, and the software itself is free. This is a great way to reduce household bandwidth usage, improve security, and learn more about how DNS works. It’s one of those rare projects that’s both incredibly practical and simple enough to set up in under an hour.
4
Build a Wi-Fi scanner with a web interface
Map nearby networks with a simple dashboard
With a little Python and the onboard Wi-Fi chip, you can transform your Raspberry Pi into a tool that scans and logs nearby wireless networks. It’s useful for checking signal strength, identifying channel conflicts, or just seeing what’s going on around your home. Pair it with a web interface using Flask or another lightweight framework, and you’ll have real-time access to your local wireless environment.
The core of the project uses command-line tools like iwlist or iw to scan for available SSIDs and pull out practical details like signal level, MAC address, and channel. This data can be parsed and displayed in a browser with just a few lines of Python. Flask makes it easy to serve a basic webpage from the Pi, which you can style with a bit of HTML and CSS to make it visually appealing.
This project won’t cost you anything unless you want to add a second Wi-Fi dongle to avoid interrupting your Pi’s connection while scanning. Even then, many budget adapters cost only a couple of dollars online. It’s an excellent way to get experience with wireless networking, web development, and system integration, all rolled into one. And it’s surprisingly satisfying to see your network data come to life on a page you built yourself.
3
Create a tiny retro terminal display
Use a spare HDMI screen as a retro info board

If you’ve got a dusty old HDMI monitor or a cheap screen from a thrift store, your Raspberry Pi can turn it into a nostalgic terminal-style display. With Python and a library like curses, you can build a simple interface that shows things like system stats, weather, RSS feeds, or even the time in a retro-inspired layout. It’s a great mix of aesthetics and utility.
The curses library lets you build text-based interfaces that look like they belong in an ‘80s hacker movie. Combine that with some basic scripting to fetch data, and you’ve got a lightweight dashboard that runs smoothly on even the oldest Pi models. You can SSH into the Pi to manage it, or have it auto-start on boot and run headless. It’s flexible, clean, and resource-efficient.
The best part is that it costs nothing if you already have a screen and a way to power the Pi. Even small HDMI displays meant for car cameras or portable DVD players will work. You can expand it with sound effects or themed animations if you’re feeling creative. For a weekend project, it strikes the right balance of retro charm and modern function.
2
Run a Bluetooth speaker notifier
Make your own audio alert system
With Bluetooth built into many Raspberry Pi models, it’s easy to use your Pi as a smart notifier that plays audio messages based on custom events. Whether it’s a reminder that your laundry is done, an alert that the mail has arrived, or a friendly chime when someone enters your home, this project turns sound into useful automation. All it takes is a little scripting and a Bluetooth speaker.
You can pair your speaker using bluez utilities, then use Python or shell scripts to trigger audio clips. Simple tools like aplay or espeak let you play sounds or generate speech from text. You can even pull in data from other sources, such as MQTT, Home Assistant, or motion sensors, to decide when the notifications should fire. It’s a small step toward smarter home automation, but it makes a big difference.
Bluetooth speakers are cheap and easy to find—yard sales, dollar stores, or clearance bins often have them for a few bucks. Once paired, they stay connected unless you reboot or go out of range. The result is a charming, voice-based way to get notified without needing a phone, screen, or email. It’s fun, functional, and easily expandable for more use cases.
1
Make a low-power e-paper weather station
Display live weather with almost no energy use
If you have a cheap e-paper display, your Raspberry Pi can drive it to show weather conditions with very little power consumption. These displays are perfect for low-refresh applications like current temperature, humidity, and forecasts. They only use power while refreshing, so once the image is rendered, they can sit idle for hours without drawing current. This makes them ideal for small, always-on dashboards.
You can use the OpenWeatherMap API or a similar service to pull in weather data every hour or so. With Python, it’s easy to request that data, format it into an image using Pillow, and send it to the display. Libraries provided by most e-paper manufacturers simplify the communication process with GPIO pins. It’s a calm, quiet project that looks great on a desk or mounted by the front door.
Many small e-paper displays can be found online for under $5, especially if you’re okay with slower refresh rates or basic monochrome visuals. If you’re into minimalism or want a subtle way to check the forecast, this setup is perfect. It’s also a gentle introduction to APIs, working with sensors, and image processing. Even if you don’t use it daily, it’s a beautiful project to build and show off.
These projects bring value with almost no cost
Each of these Raspberry Pi projects is simple enough to complete in a weekend and affordable enough to try without hesitation. Whether you’re building a network tool, a retro display, or a smart notifier, you’ll learn new skills and end up with something useful. The best part is how far just a few dollars can take you with a Pi and a little curiosity.
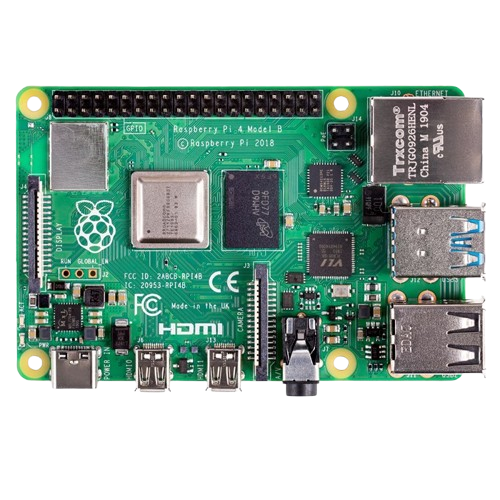
- Storage
-
MicroSD card slot
- CPU
-
Arm Cortex-a72 (quad-core, 1.8GHz)
- Memory
-
1GB, 2GB, 4GB, or 8GB of LPDDR4
- Operating System
-
Raspberry Pi (Official)
This inexpensive SBC is well-suited to a wide variety of DIY projects for entertainment, network administration, or just to amuse yourself and others